Introduction
Overview
Site location
Activities
Planting
Harvesting
Budget
Project Acknowledgments
Introduction
 Spanish Translation: De Semillas a Ensalada
Welcome to Seed to Salad, an adaptable project that genuinely engages young people in growing salad gardens of their own.
Seed to Salad is a program of the Ithaca Children’s Garden (ICG) in Ithaca, NY. Originally conceived as an after-school program, it has engaged over 300 youth ages 3 to 12 in growing salad gardens at the Ithaca Children’s Garden and Tompkins County Schools.
In 2007, in partnership with Northeast Elementary School and with the support of an Ithaca Public Education Initiative Grant, ICG expanded Seed to Salad to a February-June school based program.
We are excited to share these resources in partnership with ICG.
This model emphasizes:
- A high level of youth decision-making and a multidisciplinary approach
- Activities that involve nutrition, physical activity, art, democratic processes, planning and problem solving, math, science, developing horticulture skills, and language arts
- Harvest in June, before the end of the school year
- The use of minimum garden space
- Youth decision-making and a high level of youth participation, which keeps students interested and committed
- A range of activities that lets adult leaders adapt Seed to Salad to meet their goals
Like any program, Seed to Salad will benefit from the ideas and activities added by educators adapting the program to their audience and setting. We want to hear how you’ve adapted and used this resource. Send an email and tell us about your Seed to Salad experiences.
Leigh MacDonald-Rizzo, ICG Education Director: leigh@ithacachildrensgarden.org
Ashley Helmholdt, Cornell Garden-Based Learning: alm443@cornell.edu
top
Overview
School-Based Seed-to-Salad (pdf) runs from February through June, combining classroom experiences with hands-on activities in the garden.
Seed-to-Salad After School (pdf) is an adaptable eight week program that incorporates garden design, planting, harvesting, and celebrating.
Ordering Seeds (pdf) offers up how-to tips for this aspect of the program.
Please note: This program was developed in Ithaca, NY. The above schedules are applicable to most of the Northeast, but if you live in another region you may want to contact your local Master Gardeners to develop the best planting and harvesting schedule for your climate.
top
Site location
 Finding a Place to Garden
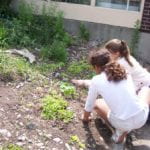
You don’t need much space for salad! Look for an area where your group can create enough small plots (approximately 3’x3’) for each person (or pair) with at least 3’ paths between.
When space is difficult to find…
Some schools have little or no green space. If this is your situation, consider large container gardens or building raised beds on top of a paved area. This will add a bit to the cost of your project but consider the containers, raised beds, and soil an investment that can be used for several years.
- Reclaim neglected spaces. Some schools may have designated garden spaces that are currently in use or neglected. This offers a compromise. Your administration may view it easier to extend an existing garden area than to create a new area. Reclaiming an area that has been neglected provides your program with a space and the school grounds with a face-lift.
- Create new gardens. Some community organizations, such as schools, may welcome the idea of a temporary garden space. If administrators are uneasy about making the commitment you may want to offer a trial to till a small area of lawn, plant as a garden, and then, reseed as lawn. Others may welcome the idea of creating a permanent new gardening space. Consider raised beds to help define an area and ease maintenance and weeding concerns.
- Communicate. Overall the most important step in determining a gardening space for your program is to communicate with administrators, custodial, and grounds staff. Be sure to have ongoing conversations with grounds and custodial staff during the planning and design phase.
- Plan. Come prepared with how much space you think you will need as well as other requirements such as light exposure and access to water. Get familiar with the grounds before meeting so that you are aware of what kinds of spaces are available. Be ready to answer questions about funding: “who will pay for this” may be one of the most frequently asked questions. Have a maintenance plan that includes “who, how, when.”
 A little inspiration…
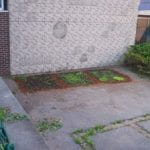
During the Ithaca Children’s Garden Seed to Salad pilot at Northeast Elementary School, we reclaimed three garden areas that were no longer actively managed. Many hands made light work and during the pilot program we prepared three reclaimed areas for 11 new salad garden plots during one Saturday morning work party involving student and parent volunteers.
top
Activities
The core activities of Seed to Salad (downloadable pdf documents):
Gear up for Gardening Assembly
Designing Quilt Block Salad Gardens
- Nutrition Superheroes Veggie Cards
- Nutrition Superheroes Super Powers
- Nutrition Superheroes Veggie Cards for Younger Children
- Nutrition Superheroes Super Powers for Younger Children
Planting
Planting Tips Printer-Friendly PDF
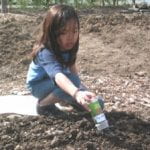 Many salad garden vegetable seeds are tiny. They can be hard to handle and plant, and they easily blow out of a cupped hand with even a slight breeze. To deal with this, reuse empty plastic spice containers. If you put the word out early to parents and volunteers, you can often accumulate a good amount.
Step by step
- Label each spice container with the name of the seed and the number code you assigned it during the design phase.
- For seeds that will be used a lot, such as lettuces, consider having two or three shakers available.
- If you’re working with younger children, have an extra adult or older youth volunteer on the sidelines to help fill up shakers. This way you can add just enough seed to each shaker for a single plot, avoiding spills or dumping too much seed in one place.
Other tricks of the trade
- If you have the space, consider having a “test plot” to demonstrate planting techniques before youth head off to plant their own plots.
- You can use a design everyone worked on together or make one up on the spot.
- Start by identifying the edges of the plot, and orienting the plan on the ground nearby.
- Along the way, give a demonstration and then have youth take turns outlining and planting different areas of the “test plot.”
Three ways to outline your design in the soil prior to planting:
- Use a twig, stick, or small branch to “draw” the design in the soil.
- Draw the design by sprinkling white play sand.
- Use carefully placed pebbles, gravel, or small stones to create the outlines of your shapes.
Demonstrate
- Show the angle to hold the shaker so that seeds come out easily.
- Demonstrate different kinds of shaking and have a conversation about what appears to be too light, too hard, and just right
- Show how to take handfuls of spare soil and sprinkle it over newly planted seeds.
- Some seeds need to be planted rather than sprinkled on top of the soil. Show how to lay seed, such as nasturtiums, spaced on top of the soil, then push them gently into the soil.
Watering tips
- Watering a newly planted salad garden can be tricky. Lots of tiny seeds are sitting on or just below the soil surface. A gush of water will send them cascading far from where they were planted. You may want to do a demo on a spare patch of bare soil.
- Avoid using watering cans until seedlings begin to emerge.
- Use an adjustable water wand on the gentlest setting.
- Demonstrate holding the wand high enough and slowly moving it back and forth to avoid “mudslides” and “puddles.”
Experiment
- Plant a few seeds in each area of two trial areas, water one gently and the other too vigorously. How does it effect growth?
Harvesting
When it’s time to make salad, here are harvesting tips that are simple and fun:
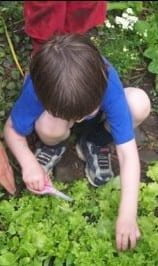
- Harvest with kid-size scissors. It’s hard to pick lettuce and greens without tearing up the roots. It also makes them easier to wash, since you’re not pulling out soil. Using scissors, cut lettuces and greens just above the soil.
- Have plenty of bowls handy for harvested lettuce and greens.
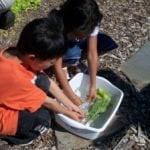
- Large plastic storage tubs are ideal for washing lettuce and greens. Fill about half way with water, add a little lettuce and greens at a time, swish around and remove. Place lettuce and greens in colanders and shake to get rid of excess water. Refill with water as it becomes dirty.
- Become human salad spinners! Gather a dozen or so clean pillowcases. You may want to invest in some inexpensive ones reserved for your Seed to Salad project. Add a couple handfuls of lettuce that has been washed and drained in colanders to the pillowcase. Close, grip and start spinning.
- Keep salad bowls separate from harvest bowls. Keep a couple large bowls reserved for clean, dry lettuce and greens.

Budget
 Sample Budgets for the after school program and school-based Seed to Salad pilot projects are available here in PDF. While these projects have relatively low budgets, costs can be further curbed by seeking donations in advance from area businesses and other partners.
Project Acknowledgments
Many thanks to the following individuals and organizations:
Ithaca Children’s Garden: support for program development and implementation
Cornell Garden Based Learning: support for toolkit development, web design and hosting
Northeast Elementary School: location for Seed to Salad pilot program
Ithaca Public Education Initiative: grant funding for school-based pilot program
Kelly Craft, Pre-K Teacher, Northeast Elementary School: support of school-based Seed to Salad program
Students at Northeast Elementary School: development of school-based Seed to Salad program
Mary Alyce Kobler and Mya Thompson, Ithaca Children’s Garden Volunteers: development of original Seed to Salad after school program
Leigh MacDonald-Rizzo, Education Director, Ithaca Children’s Garden: program development and pilot testing, overall coordination of Seed to Salad Program, toolkit author
top


